")
")
")
")
")
")

Home automation module that can be used as a stand-alone single or dual axis solar tracker, working autonomously.
Can also be controlled by a home automation system, like Domoticz (using DomBus firmware + Domoticz plugin), Home Assistant, Node-RED, OpenHAB, ioBroker and other systems supporting MQTT protocol using DomBus firmware + DomBusGateway (a python software performing DomBus2MQTT bridge), or custom applications and other sustems supporting the Modbus protocol (using DomBusTracker2 version with Modbus firmware).
Please select the English page for the most up-to-date original information.![]()
Why DomBusTracker2?
- It can be configured as dual-axis, single horizontal axis, single tilted axis mode
- It works in stand-alone mode, but also can be monitored and controlled by Home Assistant, Domoticz, Node-RED and other automation systems supporting Modbus or MQTT / MQTT-AD
- It uses a waterproof deep-hole light sensor that permits to optimize power production even when it's cloudy, orienting solar panels toward the brigthest portion of the sky
- Very compact, easy wiring, uses a strong industrial bus solution (RS485) that can be connected to a controller by up to 500-1000m of shielded cable (standard alarm cable)
- Very low power consumption (15mW during the night) with relays OFF
- Automatically detects limit switches inside linear actuators
- Manages additional 4 proximity sensors or limit switches, suitable for slewing gears.
- Manages a anemometer with 3-5V output or pulsed output to put the solar panels in a safe position in case of strong wind. If a anemometer already installed on site, no need to connect additional sensors: just send wind speed value by bus (using a automation).
- Tracker status shown on the automation system. Of course it's possible to control elevation / azimuth by the automation system (smartphone).
- Optional UP/DOWN buttons to manually control elevation and azimuth, and one switch to set manual / automatic (tracking) mode.
- Buzzer output to notify the manual mode and wind safe mode (strong wind, panels in safe position).
- Night position and Wind safe position are configurable by the automation system (or Modbus registers), as like as several other parameters: default parameters are already suitable for almost any dual axis solar tracker.
Why a solar tracker?
Sun tracker is very good for photovoltaic systems because enhances the total production energy and, moreover, increases the power during the early morning and late afternoon, when energy is more expensive and less available.
The following chart shows the comparison of the energy produced in a sunny day, October 31 2024, in the Northern Italy, between a 2-axis solar tracker and a photovoltaic on the roof.
![]()
![]()
Comparing the two systems, we can say that in these conditions the 2-axis tracker performs almost 3 times over photovoltaic on the roof . Normally it performs almost twice a photovoltaic system on a roof oriented to South, with a normal tilt for italian houses (around 15 degrees). ![]() YouTube video
YouTube video
This controller was designed to overcome the limitations of the chinese XMYC-3 controller, using the same sun sensor, but adding some features like the automatic detection of the limit switches inside the motors (linear actuators have limit switches inside, that cut-off power) and the home automation system integration with Domoticz, Home Assistant, Node-RED, OpenHAB, ioBroker, and other systems supporting MQTT or Modbus protocols.
Features![DomBusTracker controller works perfectly even if cloudy, optimizing photovoltaic power production.]()
- Configurable as dual axis, horizontal single axis and tilted single axis tracker.
- Use a standard waterproof sun sensors made by 4 photodetectors, to determine the best tilt/azimuth even in case of clouds.
- 4x 10A relays permit to control 2 linear actuators with 800kg force (or slewing drives), supplied by a 24V (preferred) or 12V power supply unit.
- If requested, it's possible to have a version for higher power motors, 15A current limit for higher power linear actuators up to 3000kgf and higher power slewing motors.
- Current sensing to automatically detect the linear actuator internal limit switches, to find the zero and full-scale motor position.
- 4 inputs that can be connected to external limit switches or proximity sensors (NPN type, common to GND) for the azimuth motor (useful in case that a slewing motor is used instead of linear motor). Indeed, to save energy consumption, proximity sensors are powered only when needed.
- 2 inputs that can be connected to 2 optional up/down buttons to move motors manually
- 1 input that can be connected to a optional switch to disable automatic tracking
- 1 input (IN12) that can be connected to a wind sensor (anemomenter) with voltage output (3, 3.8 or 5V output) or with pulsed output (reed or NPN output): read the anemometer sensor section below
- 2x 5A additional relays for additional functions
- Internal RS485 bus terminating resistor (150 ohm) that can be enabled by a PCB jumper (with a solder iron)
- RS485 bus, that works with up to 500m of cable (using standard alarm cable: 2x0.50+2x0.22mm² + shield)
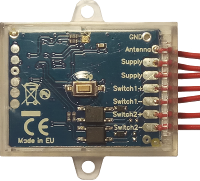
- DIN rail low-profile enclosure, 115x90x40mm
- Plugin terminal blocks for easy wiring
- Parameters configurable by RS485 bus, to work with almost any tracking system
- Available with 2 firmwares of your choice:
- DomBus firmware, using a standard multi-master protocol working with
- Domoticz + Creasol DomBus plugin
- Home Assistant, Node-RED, OpenHAB, ioBroker + DomBusGateway software that realize a bridge between DomBus protocol and MQTT with AutoDiscovery
- Modbus firmware, working with NodeRED, Home Assistant, OpenHAB and many other controllers supporting the standard Modbus protocol.
- DomBus firmware, using a standard multi-master protocol working with
- Tracker status is exposed to the home automation system or Modbus:
- 0: Cloudy mode (tracker moves less frequently to prevent energy consumption)
- 1: Automatic mode
- 2: Automatic mode, motor is moving
- 3: Manual mode
- 4: Manual mode, motor is moving
- 5: Evening (tracker is going in the night position shortly)
- 6: Night (tracker in the night position)
- 7: Night, motor is moving (tracker is going to the night position)
- 8: Morning (tracker is leaving the night position soon)
- 9: Wind alert (strong wind: tracker will go to the wind safe position soon)
- 10: Wind (tracker in the wind safe position)
- 11: Wind, motor is moving (tracker is going in the wind safe position)
- Very low power usage: 15mW with relays OFF.
- Red/green LED showing the current status:
Green LED flashing every 4s Tracker in the night/rest position Green LED flashing every 2s Tracker in cloudy mode (moves less frequently to save energy usage) Green LED flashing every second Normal mode (automatic) Green LED flashing every 0.25s Motor On, moving Red LED flashing every second Manual mode, set by the switch input or by home automation system (MAN device) Red LED flashing every 0.25s Wind gust detected (storm?), tracker in the safe position - Optional active buzzer (with oscillator, working at 5.5V) can be soldered on the PCB to get the following alerts:
The buzzer can be disabled by setting the parameter TrackerBuzzer = 0 (see table below)1 beep Tracker in manual mode 2 beeps Wind gust detected => tracker in safety mode
Although several parameters are user configurable, default value are suitable in most cases, so the device can be used as-is for most dual axis sun trackers.
Waterproof sun light sensor already supplied, while motors and 24V power supply unit are NOT supplied.
DomBus or Modbus firmware?
The sun tracker controller is available with two firmwares of your choice:
- Modbus, suitable for all systems supporting the standard Modbus protocol, and for customized systems using that protocol
- DomBus, suitable for Domoticz (using the Creasol DomBus plugin), and for HomeAssistant, NodeRED, OpenHAB, ioBroker and other systems supporting MQTT with AutoDiscovery, by using the DomBusGateway python software that realize a bridge between DomBus protocol and MQTT-AD standard protocol. Also, building automation system supporting the MQTT with AutoDiscovery will automatically detect all entities of the sun tracker.
Before ordering DomBusTracker2
Before placing an order, please write to
- type of tilt motor (linear actuators with internal limit switches?) and min/max motor current (used to determine the right resistor for current sensing)
- type of azimuth motor (linear actuator with internal limit switches, or slewing drive with external limit switches), and min/max current (used to determine the right resistor for current sensing in case of linear actuator)
- firmware type: supporting Dombus protocol, suggested for systems monitored/controlled by Home Assistant, Domoticz, NodeRED, OpenHAB, ioBroker. Or supporting Modbus RTU in case that the system is not controlled by any home automation system, or is controlled by a system or custom program communicating by Modbus.
Please note that max current, on each motor, should be less or equal than 10A.
Connection schematic
![]()
How DomBusTracker works
- By default, it works as a dual axis tracker controller, but it can be configured as a horizontal axis or tilted axis tracker by changing the TrackerType parameter: check the configurable parameter section below.
- It uses a deep hole light sensor to find where the sky is brighter: this works also in case of cloudy weather, so panels will be oriented automatically to the brighter area in the sky. DomBusTracker shows the values of the light sensor for each direction, and also a % value (see ports NS and EW): when tracker is aligned to the sun, NS and EW is near 50%. If a displacement occurrs, it's compared with 50+/-TrackerLightDeviation* to determine if tracker must be moved or not.
For example, if NS >= 50+TrackerLightDeviationNS then activate motor MS to increase tilt.
If EW >= 50+TrackerLightDeviationEW then activate motor MW to move panels toward West.
In case that EW<50, value is compared with 50-TrackerLightDeviationEW*2 to avoid trackers with fast motor to move to West and then return to East. - The following parameters must be configured: TrackerWorkingTimeNS that sets the working time of the tilt motor, TrackerWorkingTimeEW that sets the working time for the azimuth motor.
Also, it's possible to configure TrackerHomingNS that sets the number of moving requests for tilt after which the controller moves to 0 or 100% position to keep position accuracy: the homing feature is not performed while tracking the sun, but only when a command to move to a certain fixed position (including night, morning and wind position) is requested. Similarly for TrackerHomingEW , for the azimuth position. - This controller measures the current fed to the motors, to detect the motor internal limit switch (normally available in the linear actuators). In case of slewing gears, normally open (default) or normally closed limit switches can be used. In case that proximity sensors are used, it's possible to set TrackerProximityEnable to 1 or 2 to provide power supply to the sensors. When TrackerProximityEnable=1, power is provided only when needed, reducing energy usage. Normally, NPN proximity sensors with NC output are used so, in case that a proximity cable is broken, motor stops working.
- Tracker is moved every 5 minutes (TrackerPeriodicCheck) , while sunny, or every a longer time (TrackerPeriodicCheckCloudy) when cloudy (check TrackerCloudyThreshold parameter to set the light threshold to discriminate cloudy from sunny condition): parameters are shown below and may be changed by the user. The longer time is set to avoid tracker change position too often when cloudy.
- When light decreases, in the evening, going below the TrackerSensorMin value, a counter start increasing and when it reaches the TrackerNightTime value (300 seconds, by default), panels will be oriented to the TrackerNightPositionNS (tilt) and TrackerNightPositionEW (azimuth) position.
- When light increases, in the morning, going above the TrackerSensorMin value, panels are oriented to the TrackerMorningPositionNS (tilt) and TrackerMorningPositionEW (azimuth) position.
- If a anemometer is connected to the Wind input, it measure the anemometer frequency comparing with the TrackerWindThreshold value: in case that wind speed stays above this threshold for TrackerWindStartTime seconds, panels position is saved and panels will be moved to a safe position set by TrackerWindPositionNS and TrackerWindPositionEW. When wind speed falls below the threshold for TrackerWindRecoveryTime seconds, panels will be moved to the previous position.
The system works also without a direct connection to the anemometer: the wind speed can be provided externally, by a building automation system getting this information from a weather station for example: in this case it's sufficient a simple automation to write the wind register / entity of the tracker controller, nice solution in case of a large photovoltaic farm with several trackers, or in case that a weather station is already available.
![]()
Wind sensor (anemometer)
The following solutions are supported, to measure the wind speed and put the tracker in a safe position in case of strong wind.
Anemometer with voltage output (default)
A cheap aluminum anemometer with voltage output, 0÷3V, 0÷3.8V or 0÷5V, like https://it.aliexpress.com/item/1005010675847572.html , can be used to measure the wind speed. This king of anemometer has a black wire (that should be connected to GND) and brown or blue wire (that should be connected to Wind terminal block): as they have inside a DC generator, an external 220uF 10V capacitor should be added between GND and Wind terminal block to shave the spikes produced by the generator.
The Wind entity is already configured, by default, to manage this kind of anemometers (configured as IN_ANALOG): the voltage value is read in the range 0÷65535 where 65535 corresponds to 3.3V. As the wind terminal block has an internal 10k pullup resistor (suitable for pulsed output), it's possible that the read value is 200÷500 when anemometer is still.
Example: if the anemometer output at 20m/s is 1.3V, read value is 65535*1.3V/3.3V=25800 so the TrackerWindThreshold value must be set to 25800 to bring tracker in safe position when wind speed goes over 20m/s.
Domoticz: set Wind port as IN_ANALOG,INIT=25800
DomBusGateway (Home Assistant, ....): set Wind port as IN_ANALOG,INIT=25800
Modbus: set reg. 256+13-1=268 to the value 8 (IN_ANALOG), and set reg. 10012 (TrackerWindThreshold) to the value 25800 (or another suitable value)
Anemometer with pulsed output (with reed sensor, NPN output, NPNR output)
The Wind terminal block already have a 10k pullup resistor, so pulsed and NPN output will works perfectly without adding external resistor. NPNR output will work as well, but assure that output voltage is not more than 5.5V. Also, please note that some wind sensors with pulse output produces 20 pulses per revolution, to increase the sensitivity at very low speed: assure that the max number of pulses, for the max wind spees, is lower than 4000 pulses/sec.
Domoticz: set Wind port as IN_COUNTER,TypeName=Custom,INIT=120 to put the tracker in safe mode when anemometers produces 120 pulses/sec
DomBusGateway (Home Assistant, ....): set Wind port as IN_COUNTER,INIT=120 to put the tracker in safe mode when anemometers produces 120 pulses/sec
Modbus: set reg. 256+13-1=268 to the value 10 (IN_COUNTER), and set reg. 10012 (TrackerWindThreshold) to the value 120 (or another suitable value)
External weather station
In case of a large solar farm, it will be useful to have a unique wind sensor connected to the system automation (Home Assistant, Node-RED, Domoticz or Modbus custom application) sending the current wind speed to all trackers: in this case it's not needed to mount a anemometer on each tracker, but it's sufficient a simple automation that writes the current wind speed, every 5-60s, to the Wind entity of each tracker. For example, if wind speed is provided in m/s, it's possible to set on each tracker the parameter TrackerWindThreshold with the value 20, for example, to put trackers in safe position when wind speed is over 20m/s.
Domoticz: set Wind port as IN_COUNTER,TypeName=Custom,INIT=20
DomBusGateway (Home Assistant, ....): set Wind port as IN_COUNTER,INIT=20
Modbus: set reg. 256+13-1=268 to the value 10 (IN_COUNTER), and set reg. 10012 (TrackerWindThreshold) to the value 20 (or another suitable value)
DomBusTracker ports capabilities (for the DomBus version)
Default address: 0xffd0
| Port# | Name | Capabilities | Default configuration | Description |
| 1 | MN | OUT_DIGITAL | OUT_DIGITAL | SPDT 10A relay that have to be connected to the tilt linear actuator (North/South): see schematic below. Read-only: tracker position may be changed by using the Pns and Pew control bars. |
| 2 | MS | OUT_DIGITAL | OUT_DIGITAL | SPDT 10A relay that have to be connected to the tilt linear actuator (North/South): see schematic below. Read-only: tracker position may be changed by using the Pns and Pew control bars. |
| 3 | ME | OUT_DIGITAL | OUT_DIGITAL | SPDT 10A relay that have to be connected to the tilt linear actuator (East/West): see schematic below. Read-only: tracker position may be changed by using the Pns and Pew control bars. |
| 4 | MW | OUT_DIGITAL | OUT_DIGITAL | SPDT 10A relay that have to be connected to the tilt linear actuator (East/West): see schematic below. Read-only: tracker position may be changed by using the Pns and Pew control bars. |
| 5 | RL5 | OUT_DIGITAL | OUT_DIGITAL | 5A SPST relay (only NO contact), 250Vac or 30Vdc capability, that can be used for other purposes |
| 6 | RL6 | OUT_DIGITAL | OUT_DIGITAL | 5A SPST relay (only NO contact), 250Vac or 30Vdc capability, that can be used for other purposes |
| 7 | N | IN_ANALOG | IN_ANALOG | North light sensor. |
| 8 | S | IN_ANALOG | IN_ANALOG | South light sensor. |
| 9 | E | IN_ANALOG | IN_ANALOG | East light sensor. |
| 10 | W | IN_ANALOG | IN_ANALOG | West light sensor. |
| 11 | Ins | IN_ANALOG | IN_ANALOG | North-South (tilt) motor current sensing (used to detect internal limit switches). This port should be configured as IN_ANALOG,A=0.0005,TypeName=Current (Single) to get current value in Ampere |
| 12 | Iew | IN_ANALOG | IN_ANALOG |
East-West (azimuth) motor current sensing (used to detect internal limit switches). |
| 13 | Wind | IN_ANALOG,IN_COUNTER | IN_ANALOG |
Wind input, to be optionally connected to a cup anemometer sensor with analog output (0-3.8V for example) or pulsed output to measure the frequency. |
| 14 | Bns | IN_TWINBUTTON | IN_TWINBUTTON |
Analog input that can be connected to an optional external dual button (UP/DOWN) switch to manually move the motor NS (elevation/tilt). |
| 15 | Bew | IN_TWINBUTTON | IN_TWINBUTTON |
Analog input that can be connected to an optional external dual button (UP/DOWN) switch to manually move the motor EW (azimuth). |
| 16 | Sman | IN_DIGITAL | IN_DIGITAL,INVERTED |
Digital input that can be connected to an optional switch to disable automatic mode. It can be used for maintenance, to block motors |
| 17 | LSN | IN_DIGITAL | IN_DIGITAL,INVERTED |
Input, with 10k pullup, that can be connected to a limit switch or proximity sensor (NPN type) to sense the "North" position (minimum elevation). |
| 18 | LSS | IN_DIGITAL | IN_DIGITAL,INVERTED |
Input, with 10k pullup, that can be connected to a limit switch or proximity sensor (NPN type) to sense the "South" position (maximum elevation). |
| 19 | LSE | IN_DIGITAL | IN_DIGITAL,INVERTED |
Input, with 10k pullup, that can be connected to a limit switch or proximity sensor (NPN type) to sense the "East" position (minimum elevation). |
| 20 | LSW | IN_DIGITAL | IN_DIGITAL,INVERTED |
Input, with 10k pullup, that can be connected to a limit switch or proximity sensor (NPN type) to sense the "West" position (minimum elevation). |
| 21 | NS | CUSTOM | CUSTOM |
0-100% bar showing the deviation of the maximum NS radiation direction from the current tilt position |
| 22 | EW | CUSTOM | CUSTOM |
0-100% bar showing the deviation of the maximum EW radiation direction from the current azimuth position |
| 23 |
Pns |
CUSTOM | CUSTOM |
0-100% bar showing the current tilt position |
| 24 | Pew | CUSTOM | CUSTOM |
0-100% bar showing the current azimuth position |
| 25 | Man | OUT_DIGITAL | OUT_DIGITAL |
If Off, tracker is in automatic tracking mode. |
| 26 | Buzz | OUT_FLASH | OUT_FLASH |
Optional buzzer state: 1 flash => Manual mode, 2 flashes => Wind mode |
| 27 | TrackerState | CUSTOM | CUSTOM |
Tracker status, as described above |
DomBusTracker Modbus RTU capabilities (for the Modbus version)
At power-on, the module shows on red LED the current Modbus slave address (register address=8192) in decimal format, on green LED the serial baudrate (reg. 8193), and finally on red LED the serial parity (reg. 8194).
If a value is zero, a long flash is emitted.
For example, if reg(8192)=208, reg(8193)=0, reg(8194)=0, at power the following led flashes will be shown:
2 red flashes, pause, long red flash (for 0), 8 red flashes (slave address= 0xd0 = 208 decimal), pause, 1 long green flash (reg(8193)=0 => baudrate=115200bps), pause, 1 long red flash (reg(8194)=0 => parity=None).
Device will be operative only when address/baudrate/parity parameters have been shown: then module will accept commands by Modbus RTU, and periodically shows the tracker status.
Default slave address: 208 (0xd0)
| Addr | Name | Values | Description |
| 0 | MN | 0=OFF, 1=ON. Read only. Tracker position may be changed by using the Pns and Pew control bars. |
SPDT 10A relay that have to be connected to the tilt linear actuator (North/South): see schematic below. Read-only |
| 1 | MS |
0=OFF, 1=ON. Read only. |
SPDT 10A relay that have to be connected to the tilt linear actuator (North/South): see schematic below. Read-only |
| 2 | ME | 0=OFF, 1=ON. Read only. Tracker position may be changed by using the Pns and Pew control bars. |
SPDT 10A relay that have to be connected to the tilt linear actuator (East/West): see schematic below. Read-only |
| 3 | MW | 0=OFF, 1=ON. Read only. Tracker position may be changed by using the Pns and Pew control bars. |
SPDT 10A relay that have to be connected to the tilt linear actuator (East/West): see schematic below. Read-only |
| 4 | RL5 | 0=OFF, 1 or 65280=ON, 2-65279=ON for specified time. Logic can be inverted specifying the INVERTED option (on address 512+port) |
SPST 5A, that can be used for other purposes |
| 5 | RL6 | 0=OFF, 1 or 65280=ON, 2-65279=ON for specified time. Logic can be inverted specifying the INVERTED option (on address 512+port) |
SPST 5A, that can be used for other purposes |
| 6 | N | 0-65520 depending by the solar radiation received by this sensor. | North light sensor. |
| 7 | S | 0-65520 depending by the solar radiation received by this sensor. | South light sensor. |
| 8 | E | 0-65520 depending by the solar radiation received by this sensor. | East light sensor. |
| 9 | W | 0-65520 depending by the solar radiation received by this sensor. | West light sensor. |
| 10 | Ins | 0=OFF, >0 = 16-65520 if motor current is detected. Ins = value*0.00042 [A] in case that sensing resistor is 0.12Ohm |
North-South (tilt) motor current sensing (used to detect internal limit switches). To get the current value in Ampere, multiply the value get reading this register by 0.0005 |
| 11 | Iew | 0=OFF, >0 = 16-65520 if motor current is detected. Ins = value*0.00042 [A] in case that sensing resistor is 0.12Ohm |
East-West (azimuth) motor current sensing (used to detect internal limit switches). To get the current value in Ampere, multiply the value get reading this register by 0.0005 |
| 12 | Wind | 0÷65535 in analog mode 0÷4000 in counter mode |
Frequency of the rotating cup anemomenter in Hz. Read/write: writing to this register, the wind input is disabled and the written value is used to decide if wind speed is above or below the configured level. |
| 13 | Bns | 0=OFF, 10=DOWN, 20=UP | Used to manually control the SN motor (for tilt/elevation) by an external UP/DOWN dual button |
| 14 | Bew | 0=OFF, 10=DOWN, 20=UP | Used to manually control the EW motor (for azimuth) by an external UP/DOWN dual button. |
| 15 | Sman | 0=AUTO, 1=MANUAL/STOP |
Used to manually disable motors by an external switch connected to GND: motor will be moved manually, by the Bns and Bew dual buttons, or by the Pns and Pew domotic controllers. |
| 16 | LSN | 0=Open, 1=Shorted (active status) |
Input, with 10k pullup, that can be connected to a limit switch or proximity sensor (NPN type) to sense the "North" position (minimum elevation). |
| 17 | LSS | IN_DIGITAL |
Input, with 10k pullup, that can be connected to a limit switch or proximity sensor (NPN type) to sense the "South" position (maximum elevation). |
| 18 | LSE | IN_DIGITAL |
Input, with 10k pullup, that can be connected to a limit switch or proximity sensor (NPN type) to sense the "East" position (minimum elevation). |
| 19 | LSW | IN_DIGITAL |
Input, with 10k pullup, that can be connected to a limit switch or proximity sensor (NPN type) to sense the "West" position (minimum elevation). |
| 20 | NS | 0=max radiation from the "North" side (minimum tilt). 100=max radiation from the "South" side (maximum tilt). |
0-100% bar showing the deviation of the maximum NS radiation direction from the current tilt position. |
| 21 | EW | 0=max radiation from East side. 100=max radiation from West side. |
0-100% bar showing the deviation of the maximum EW radiation direction from the current azimuth position |
| 22 |
Pns |
0=minimum tilt. 100=maximum tilt |
0-100% bar showing the current tilt position. Also, setting this register to a value between 0 and 100 automatically move the tracker to this position and set the register Man (23) to the value 1 (tracker in manual mode => no automatic tracker): in this case the automatic tracking function is disabled, useful to control the solar panel manually for example to lock the tracker in a safe position in case of hail or strong wind. |
| 23 | Pew | 0=minimum azimuth (East). 100=maximum azimuth (West) |
0-100% bar showing the current azimuth position. Also, setting this register to a value between 0 and 100 automatically move the tracker to this position and set the register Man (23) to the value 1 (tracker in manual mode => no automatic tracker): in this case the automatic tracking function is disabled, useful to control the solar panel manually for example to lock the tracker in a safe position in case of hail or strong wind. |
| 24 | Man | 0=Automatic mode. 1=Manual mode. |
If Off, tracker is in automatic tracking mode. |
| 25 | Buzz | 0=Off, 1=Manual mode, 2=Wind safe mode |
Buzzer status |
| 26 | TrackerState | 0-10, as explained below in the Features section |
This register shows the current sun tracker status |
| 255 | All input ports | bitmask: 1=> MN, 2=>MS, 4=>ME ... |
This address is used to check input state in one command |
| 256-273 | Port config | 1=OUT_DIGITAL, 2=OUT_RELAY_LP, ... |
Command used to configure port 1 (256), port 2 (257), ... as OUT_DIGITAL or OUT_RELAY_LP (low power consumption relay) or other value (see table below) |
| 512-529 | Port option | 0=NORMAL, 1=INVERTED (output normally ON, or input is ON when port voltage is 0V) | Set port option. If set to 1, output stays ON after boot until the port is asserted (then relays goes OFF). For inputs, setting INVERTED the port value is ON (1) when input voltage is 0V, OFF when input is left open with internal pullhigh enabled. |
| 8192 | Slave Address | 1-247 | Permits to change the slave address of the module, so it's possible to add other modules to the same bus |
| 8193 | Serial bitrate | 0=115200bps, 1=57600, 2=38400, 3=19200, 4=9600, 5=4800, 6=2400, 7=1200bps | Serial speed, default 115200 bps 8,n,1 |
| 8194 | Serial parity | 0=None, 1=Even, 2=Odd | Serial parity, default none (115200 bps 8,n,1) |
| 8198 | Revision, major | Read only | Get firmware version, major number. For example "02" means that revision is "02XX" where XX defined by parameter 8199 |
| 8199 | Revision, minor | Read only | Get firmware version, minor number. For example "h1" means that revision is "XXh1" where XX defined by parameter 8198 |
The following tables show some Modbus commands examples.
| Slave Addr | Func. Code | Reg.Addr | Reg.Value | Frame | Description |
| 208 | 06 | 8192 | 1 | [d0][06][20][00][00][01][xx][xx] | Change slave address from 208 (0xd0) to 1 |
| 01 | 06 | 8193 | 4 | [01][06][20][01][00][04][D2][09] | Set serial speed to 9600bps |
| 01 | 06 | 8194 | 1 | [01][06][20][02][00][01][E2][0A] | Set even parity |
| 49 | 10 | 8192 | 1,4,1 | [31][10][20][00][00][03][06][00][01][00][04][00][01][B1][71] | With a single command, set slave address to 1, serial speed to 9600bps, even parity. Original modules address was 49 (0x31) in this example. |
| 01 | 06 | 0 | 65280 | [01][06][00][00][FF][00][C8][3A] | Activate RL1 output forever (65280=0xff00) |
| 01 | 06 | 1 | 960 | [01][06][00][01][03][C0][D8][AA] | Activate RL2 for 960/32=30s |
| 01 | 06 | 255 | 0 | [01][06][00][FF][00][00][B9][FA] | Disable all outputs (Reg.Addr=255) |
| 01 | 10 | 0 | 32,0,0,65280 | [31][10][00][00][00][04][08][00][20][00][00][00][00][FF][00][E6][5C] | Set RL1 On for 1s (32), RL2 Off, RL3 Off, RL4 On - Max 10 registers can be set in one command |
| 01 | 03 | 255 | 1 | [01][03][00][FF][00][01][B4][3A] | Read a 16bit value with ports status. For example if returned value is 0xd1 (0b11010001), output status is: RL8=On, RL7=On, RL6=Off, RL5=On, RL4=Off, RL3=Off, RL2=Off, RL1=On |
| 01 | 03 | 8198 | 2 | [01][03][20][06][00][02][2F][CA] | Read 4 bytes within module version. For example, if returned value is <30><32><68><31> (in hex format), the corresponding ASCII value is "02h1" (Firmware 02h1) |
| 01 | 0F | 0 | 8,1,0xd1 | [01][0F][00][00][00][08][01][D1][3E][C9] | Set coil status to 0xd1 (0b11010001), activating RL8, RL7, RL5, RL1 and disabling other relays |
| 01 | 01 | 0 | 8 | [01][01][00][00][00][08][3D][CC] | Read coil status. If returned value is 0xd1 (0b11010001), it means that RL8, RL7, RL5 and RL1 are On |
Modbus protocol can be tested easily using a modbus program, like mbpoll for Linux:
mbpoll -v -mrtu -0 -1 -a208 -b115200 -Pnone -r 8192 /dev/ttyUSB0 1
to set the register 8192 (slave address) to the new value 1 (address must be unique, when more DomBus modules are installed).
mbpoll -v -m rtu -0 -1 -a1 -b115200 -Pnone -r 10023 /dev/ttyUSB0 120
to set working time for azimuth motor to 120s
mbpoll -v -m rtu -0 -1 -a1 -b115200 -Pnone -r 22 /dev/ttyUSB0 0 50
to move tracker to position horizontal (elevation=0%) and South (azimuth=50%)
Configurable parameters
The following parameters can be configured by the user to set motor working times and get the tracker working as preferred.
| Parameter name | Description | Range | Default | DomBus settings |
Modbus address |
| TrackerType |
Type of sun tracker: 0 = Dual axis, 1 = Horizontal single axis (axis direction N-S), 2 = Tilted single axis (axis direction: E-W) |
0÷2 | 0 | PAR1=0 on port MN | 11000 |
| TrackerPeriodicCheck | Time to wait before moving the motors again, during tracking. Please note that, at power-on, the controller wait 30s before starting motors! |
10÷2000 seconds | 300 | INIT=300 on port Man (Manual On/Off virtual device) | 10024 |
| TrackerPeriodicCheckCloudy | Time to wait before moving the motors again, during tracking, when cloudy. Please note that, at power-on, the controller wait 30s before starting motors! |
10÷2000 | 900 | PAR1=900 on port Man |
11024 |
| TrackerCloudyThreshold | Threshold for the average value of light sensor: when light sensors below this threshold, it's cloudy and tracker will move less frequently | 0÷64000 | 42000 | PAR2=42000 on port Man |
12024 |
| TrackerLightDeviationNS |
% of displacement of the NS light sensor before adjusting tilt If NS <= 50-TrackerLightDeviationNS move motor to North (reducing tilt) If NS >= 50+TrackerLightDeviationNS move motor to South (increasing tilt) |
1-20 | 3 | INIT=2 on port NS (light sensor NS) |
10020 |
| TrackerLightDeviationEW |
% of displacement of the EW light sensor before adjusting tilt If EW <= 50-TrackerLightDeviationEW*2 move motor to East If EWS >= 50+TrackerLightDeviationEW move motor to West |
1-20 | 3 | INIT=2 on port EW (light sensor EW) |
10021 |
| TrackerSensorMin | Threshold for sensors N+S to distinguish between night and day | 16÷16384 | 256 | INIT=1536 on port MS (Motor S coil) | 10001 |
| TrackerNightTime | Time to wait from night detection before moving to the night position | 60÷43200 seconds | 300 | INIT=300 on port MW (Motor W coil) | 10003 |
| TrackerNightPositionNS | Night tilt position (percentage: 0=horizontal, 100=vertical) | 0÷100 | 20 | INIT=20 on port MN (Motor N coil) | 10000 |
| TrackerNightPositionEW | Night azimuth position (percentage: 0=East, 100=West) | 0÷100 | 0 | INIT=0 on port ME | 10002 |
| TrackerMorningPositionNS | Morning tilt position (percentage: 0=horizontal, 100=vertical) | 0÷100 | 100 | PAR2=100 on port MN (Motor N coil) | 12000 |
| TrackerMorningPositionEW | Morning azimuth position (percentage: 0=East, 100=West) | 0÷100 | 0 | PAR2=0 on port ME | 12002 |
| TrackerWorkingTimeNS | Tilt actuatator working time | 10÷2000 seconds | 100 | INIT=100 on port Pns (Position percentage NS) | 10022 |
| TrackerWorkingTimeEW | Azimuth actuatator working time | 10÷2000 seconds | 100 | INIT=100 on port Pew (Position percentage EW) | 10023 |
| TrackerCurrentMinNS | Threshold to determine if current is flowing through the motor NS. 0 to disable current sensing. |
0÷16384 | 144 | INIT=144 on port Ins (current measured on Motor NS) | 10010 |
| TrackerCurrentMinEW | Threshold to determine if current is flowing through the motor EW. 0 to disable current sensing |
0÷16384 | 144 | INIT=144 on port Iew (current measured on Motor EW) | 10011 |
| TrackerHomingNS |
Max number of tilt motor activations before looking for "home" position (0% or 100%, the nearest) in case that tracker must move to a fixed position (night, wind or user defined). It's used to increase accuracy in case that motor has moved several times looking for the best sun direction, very useful in case of cloudy weather. | 10÷30000 | 20 | PAR1=20 on port Ins (current measured on Motor NS) |
11010 |
| TrackerHomingEW |
Max number of tilt motor activations before looking for "home" position (0% or 100%, the nearest) in case that tracker must move to a fixed position (night, wind or user defined). It's used to increase accuracy in case that motor has moved several times looking for the best sun direction, very useful in case of cloudy weather. | 10÷30000 | 20 | PAR1=20 on port Iew (current measured on Motor EW) |
11011 |
| TrackerInterlock |
In automatic tracking mode, always one motor is activated. If TrackerInterlock=0, in Manual mode both motors can be activated simultaneously. If TrackerInterlock=1, only one motor can be activated at a time. This can be useful when high current motors are used, to prevent overheating on terminal blocks and relays. |
0÷1 | 1 | PAR1=1 on port MS |
11001 |
| TrackerBuzzer |
0=Disable buzzer output |
0÷1 | 1 | INIT=0 on port Buzz | 10025 |
| TrackerWindThreshold |
0=Disabled |
0÷65535 if IN_DIGITAL 0÷4000 if IN_COUNTER |
23800 | INIT=23800 on port Wind |
10012 |
| TrackerWindStartTime |
0=immediate entering safe mode 1÷3600=enter safe mode after this time (in seconds) where wind speed is always greater than TrackerWindThreshold |
0÷3600 | 30 | PAR1=30 on port Wind |
11012 |
| TrackerWindRecoveryTime |
Time to wait before returning from safe to automatic mode, when wind speed drops below TrackerWindThreshold level |
30÷3600 | 300 | PAR2=300 on port Wind | 12012 |
| TrackerWindPositionNS |
Tracker elevation in safe position (percentage: 0=horizontal, 100=vertical). If value = 101 => elevation is ignored (not changed in case of strong wind) |
0÷101 | 10 | PAR3=10 on port Wind | 13012 |
| TrackerWindPositionEW |
Tracker azimuth in safe position (percentage: 0=East, 100=West). If value = 101 => azimuth is ignored (not changed in case of strong wind): this can be useful in case of dual axis sun trackers with slewing motor and very long azimuth working time, where it's just needed to put tracker horisontal |
0÷101 | 101 | PAR4=10 on port Wind | 14012 |
| TrackerProximityEnable |
Enable power supply for proximity sensors. |
How to configure DomBusTracker with Domoticz
DomBus protocol version is needed to work with Domoticz.
The Creasol DomBus plugin should be installed: it may be downloaded from https://github.com/CreasolTech/CreasolDomBus or it can be installed from Python Plugin Manager or Domoticz Plugins Manager.
The configuration steps are:
- Once connected to Domoticz controller, you can see a new device in the Switches panel with address ff38: edit that device and add in the Description field the text ,HWADDR=0x3801 to change its default address to 3801 or another unique value: then refresh Switches panel to see all devices, each for each port. Some other devices will be found in Utility panel (light and current sensors).
- Configure the motor working times, in seconds, by writing in the Description field of Pns device ,INIT=80 if time to go from horizontal to vertical position (or vice versa) is 80s, and write in the Description field of Pew device ,INIT=140 if total time to move the tracker from East to West is 140s.
- Configure the morning / sleep position: for example, TrackerNightPositionNS=20 (tilt=20%, almost horizontally, addr=10000) and TrackerNightPositionEW=0 (azimuth=0%, toward East, addr=10002).
- In case that a wind sensor is connected, configure the parameter TrackerWindThreshold, TrackerWindStartTime, TrackerWindRecoveryTime, TrackerWindPositionNS, TrackerWindPositionEW (see the configuration table below): when tracker is in automatic mode (not MANUAL!) and anemometer produces a frequency higher than TrackerWindThreshold for at least TrackerWindStartTime seconds, it move the tracker to the TrackerWindPositionNS/TrackerWindPositionEW. When anemometer frequency remains below the TrackerWindThreshold for more than TrackerWindRecoverTime, tracker returns to the previous position, then start tracking automatically.
- If needed, change other parameters explained in the section Configurable parameters above.
- Tracker can be moved by pushbuttons, if connected to IN7 and IN8 as shown in the schematic. Also it can be locked or restored in automatic mode by the switch connected to IN9. These manual commands are usually not needed.
- Tracker can be moved also from the smartphone, PC or tablet, by moving the sliders Pns (postion for tilt motor NS) and Pew (position for azimuth motor EW). For example setting Pns=0 and Pew=0 the tracker will return to the "morning" position, oriented to East and horizontally. Please note that when tracker is moved manually, the Man device is automatically set to On disabling the automatic sun tracking function. This is useful for example in case of storm: tracker can be placed manually (or by an external automation) in a safe position (for example Pns=0 and Pew=0 or 100); when storm has passed, DomBusTracker can be restored in automatic mode, setting Man=0ff to track the sun/light automatically.
![]()
How to configure DomBustracker with Home Assistant, Node-RED, OpenHAB, ioBroker
If DomBusTracker is programmed with DomBus firmware, you can install the python software DomBusGateway that implement the DomBus 2 MQTT interface with AutoDiscovery function.
In this way, the home automation system automatically detects the DomBusTracker module, creating all entities.
To configure the working parameters of the tracker, it's possible to use connect DomBusGateway by telnet, configuring each port as needed.
TODO: configuration example
How to configure DomBusTracker with Modbus firmware
Modbus firmware is very versatile because can be used in many different ways, for example with NodeRED with its UI and Modbus palette, Home Assistant using the Modbus integration, but also directly by using mbpoll or modpoll program to configure the few parameters to get it working correctly.
The configuration steps are:
- Identify the modbus parameters: slave address, bitrate, parity. They are shown at power-on using red and green leds, as specified in the DomBusTracker Modbus RTU capabilities section above (by default address=208, bitrate=115200, parity=None).
- If needed, configure device with a unique address, from 1 to 247 (writing the new address value to register 8192)
- In case of using the controller for a horizontal single axis tracker (HSAT), write 1 to the register TrackerType (11000), while in case that a tilted single axis tracker is used (TSAT), write 2 to the register TrackerType (11000). Default: dual axis tracker (DAT).
- Configure the motor working times, in seconds, by setting the registers TrackerWorkingTimeNS (tilt working time, addr=10022) and TrackerWorkingTimeEW (azimuth working time, addr=10023).
- Configure the morning / sleep position: set for example TrackerNightPositionNS to 20% by writing 20 to address 10000, and TrackerNightPositionEW=0 by writing 0 to address 10002
- In case that a anemometer is connected to the Wind terminal block, or in case that wind speed value is sent to device (by writing the register 12), the following parameters must be configured:
TrackerWindThreshold (register 10012) = wind speed / frequency above which the controller starts counting
TrackerWindStartTime (register 11012) = time, in seconds, the wind speed must be over the trackerWindThreshold before moving panels to the wind safe position
TrackerWindRecoveryTime (register 12012) = time, in seconds, the wind speed must be below the trackerWindThreshold before restoring panels to the old position, exiting wind safe mode
TrackerWindPositionNS (register 13012) = tilt position, in percentage, for the wind safe position. 0=horizontal, 100=vertical
TrackerWindPositionEW (register 14012) = azimuth position, in percentage, for the wind safe position. 0=East, 100=West - By default limit switches are configured as Normally Open, with GND = common, so limit switches are ignored if not installed. In case that limit switches or proximity sensors are Normally Connected, remove the INVERTED option to port 16÷19 by writing 0 to register address 528÷531
- If needed, change other parameters explained in the section Configurable parameters above using the same methods above.
- Tracker can be moved by pushbuttons, if connected to Mv.N, Mv.S, Mv.E and Mv.W inputs. Also, tracker can be locked (manual mode) or restored in automatic mode by the switch connected to Man terminal block. These manual commands are usually not needed, because the system can be managed by the smartphone if a home automation system is used.
- Tracker can be moved also from the smartphone/PC by writing the position in % to Pns (position NS or elevation/tilt) and Pew (position EW or azimuth). For example setting Pns=0 (writing 0 to register 22) and Pew=0 (writing 0 to register 23) the tracker will return to the safe position, oriented to East and horizontally. Please note that when tracker is moved manually, the Man device (register 24) is automatically set to On (1) disabling the automatic sun tracking function. This is useful for example in case of storm if the Wind input is not connected to any anemometer: tracker can be placed manually (or by an external automation) in a safe position depending by wind speed and direction, to also prevent panel damage by hail.