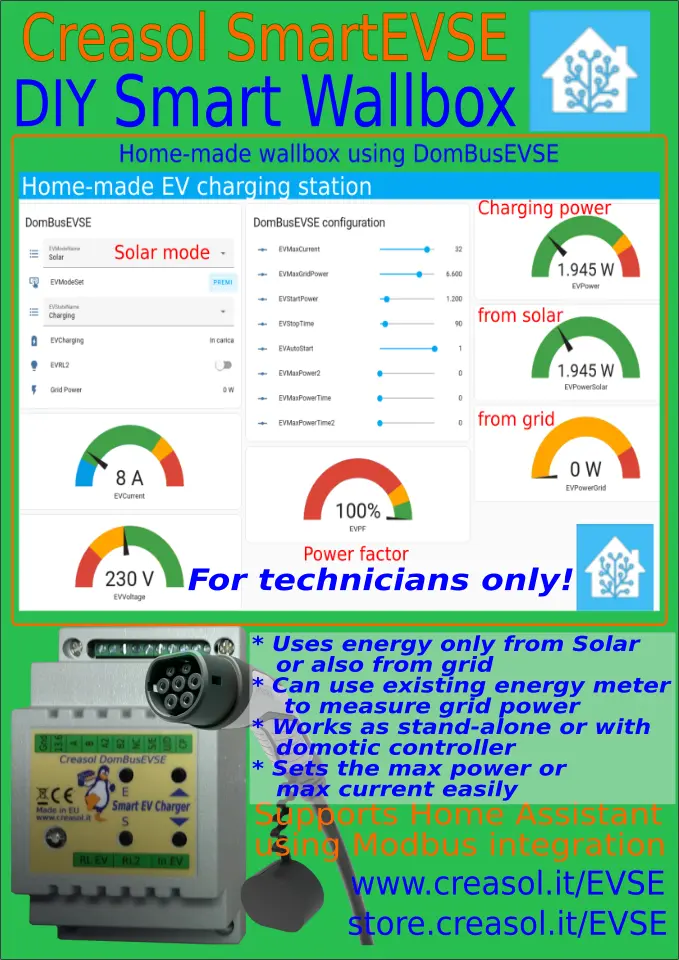
Short checklist to make a charging station by yourself using Creasol DomBusEVSE module
Following the instructions below you can make an EV charging station that checks the mains power usage to prevent overload, disconnection and also to use only energy from photovoltaic. DomBusEVSE module, once programmed, can works by itself, in stand-alone mode, without the need of a domotic controller.
- Be sure to know what your're doing: you must have knowledge about power dissipation and electric systems. You must be an electric technician to make a wallbox by yourself!
- You also must have some computer knowledge and know what is a home automation systems and Modbus protocol.
- DomBusEVSE module is the EVSE controller that permits to communicate with the On-Board Charger of your vehicle, for AC charging, single-phase and three-phase: choose the DomBusEVSE version for your need:
- with DomBus proprietary protocol, working with Domoticz,
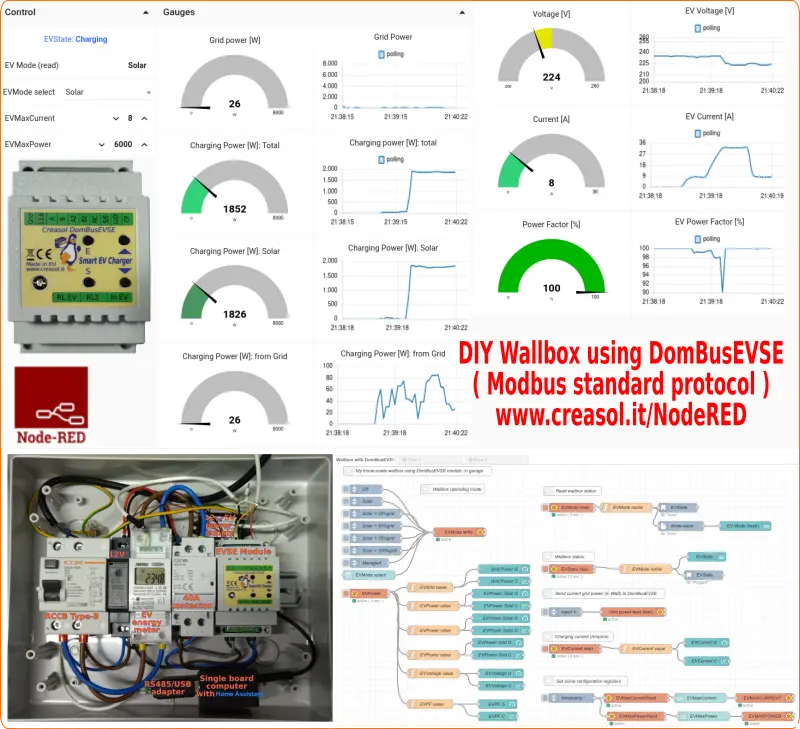
- with Modbus standard protocol working with Home Assistant, Node-RED, OpenHAB, and many other home automation systems.
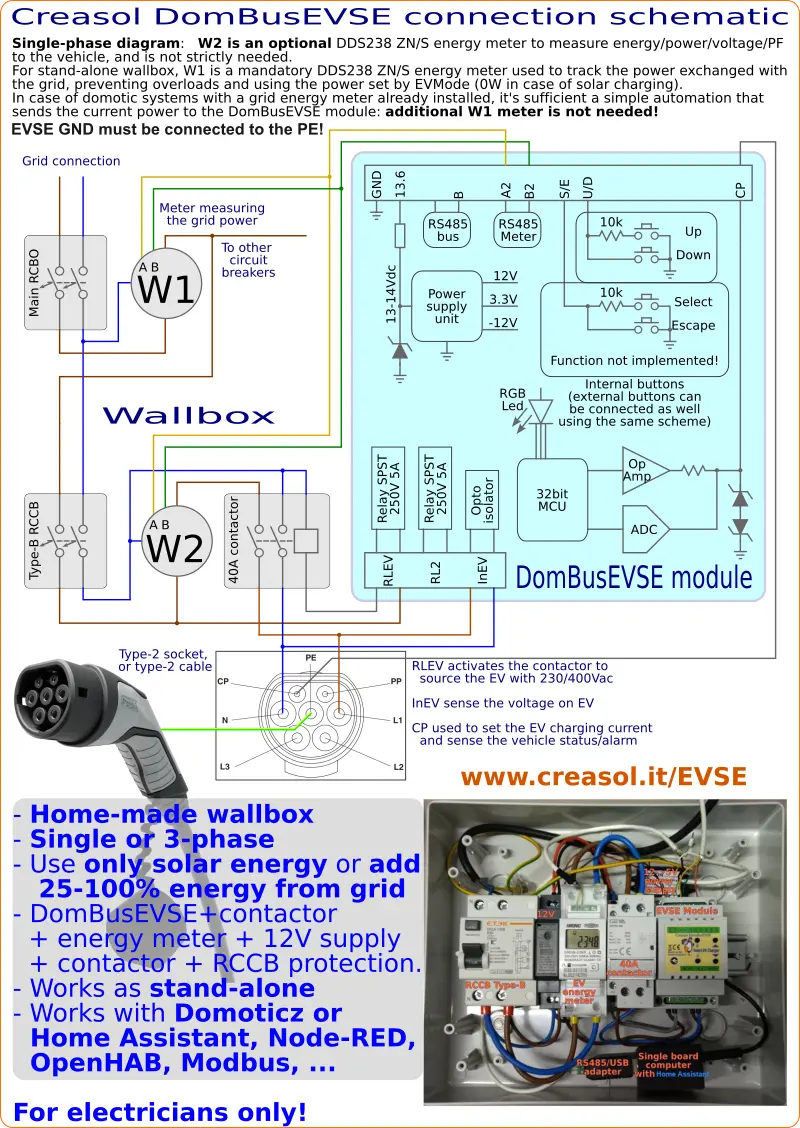
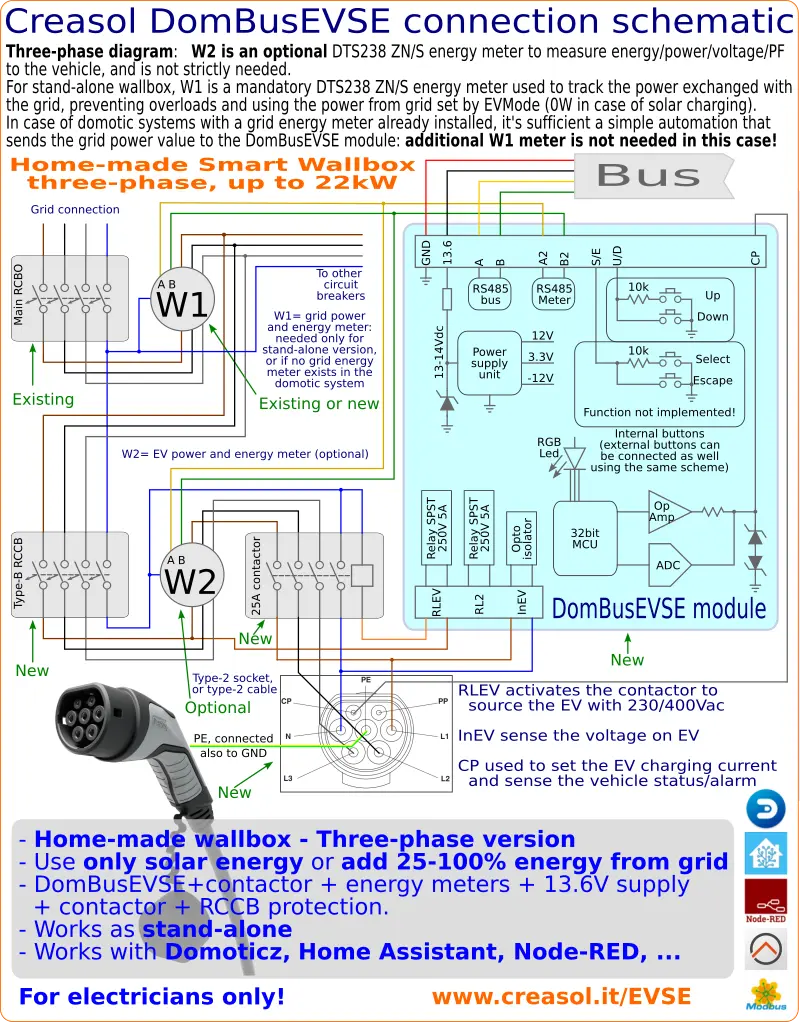
- Find below the diagrams for single-phase and three-phase wiring: you need at least a 2P or 4P RCCB (protection) and contactor, the EV cable, and RS485/USB adapter (or RS485/TCP). Components are available in our store, also available in KITs, but as they are standard you can find them everywhere.
- It's better to use 10mm² wires for 32A and 6mm² wires for 16A wallbox, to minimize power dissipation on cables. Connections must be checked periodically to ensure that screws are tightened well so that the terminals do not heat up after 15 minutes or more at max charging power!
- If you have a home automation system with mains energy meter connected to the domotic controller, measuring the grid power (negative in case that power is exported to the grid), you don't need for another meter connected to the EVSE module: just make a simple automation that periodically sends the current grid power to the EVSE module (every 1-6s).
- A power/energy meter measuring the EV charging power/energy is not strictly needed, but recommended. DomBusEVSE supports DDS238-2 ZN/s (single phase) and DTS238-4 ZN/S (three-phase).
- RS485 buses require at least 1 termination resistor (100-150 Ohm), and much better a resistor in each bus end: for EVSE-home automation bus, it's possible to enable the resistor by shorting the Rb PCB jumper. For EVSE-energy meters, the resistor is already enabled inside the EVSE module.
More info:
- Info about the DomBusEVSE module
- Creasol store with some products for EV
- HomeAssistant: Configuring DomBusEVSE
- HomeAssistant: Using DomBus modules with HA
- Node-RED: Configuring DomBusEVSE
- Domoticz: Configuring DomBusEVSE
Single phase homemade wallbox EV charging station schematic
Three-phase homemade wallbox EV charging station schematic
Node-RED dashboard for your home-made wallbox using DomBusEVSE module
Home Assistant dashboard for your wallbox using DomBusEVSE module