")
")
")
")
")
")

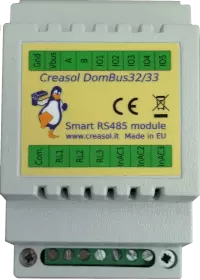
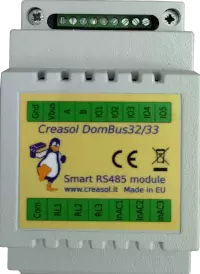
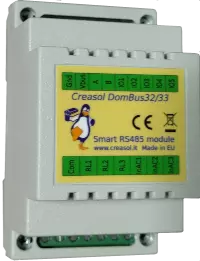
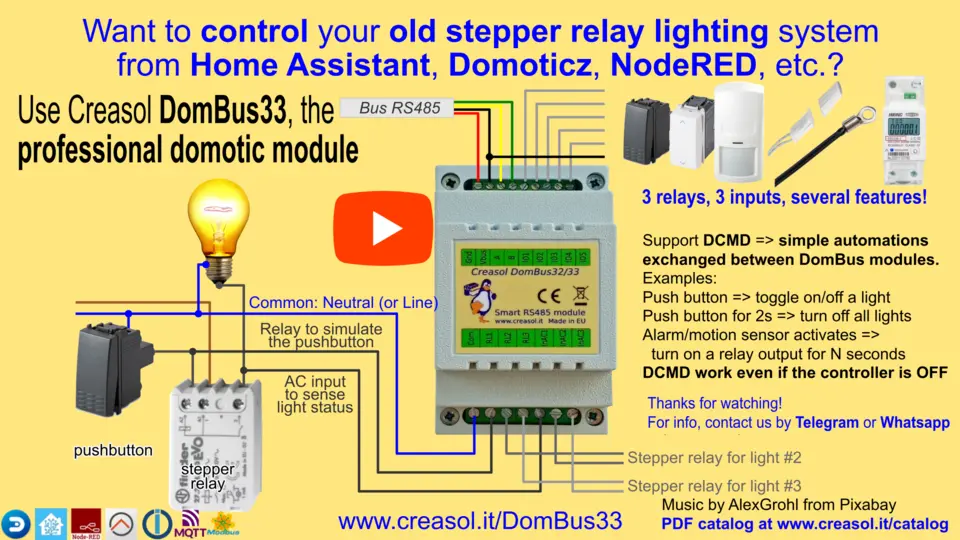
DomBus33 is a DIN-RAIL module, 54mm wide, designed to control an existing lighting system with 3 lights using 115/230V pushbuttons and stepper relays.
DomBus33 has 3 relay outputs, that can be used to send pulses to existing step-by-step relay coils to toggle lights ON/OFF, 3 AC inputs to be connected to the step-by-step relay output to know the ON/OFF light status, and 5 low-voltage I/Os that can be connected to additional pushbuttons and/or switches to activate/deactivate single lights, or activate/deactivate all lights (useful to turn all lights OFF when leaving home).
In this way lights can be controlled by both existing pushbuttons and domotic controller (smartphone, web interface, automation, scenes, groups).
To simplify wiring, the terminal block has 3 terminals for relays, 3 for AC inputs, and 1 terminal for the common (usually Neutral, but Line can be used as well): in this way it's easier and faster to connect the module to the light system, minimizing wirings. Please take care to connect only loads that are protected by the same RCCB (circuit breaker).
As other DomBus modules, all ports can be configured in many different ways, and also this module supports DCMD, commands sent to the same or other modules to perform simple actions, that permit to achieve high reliability (DCMD commands work even if domotic controller is not operational) and easy programming (don't need to create automations in the domotic controller, just configure DomBus ports to perform actions on events). Last, but not least, as other DomBus modules it's optimized to get low power consumption, less than 10mW normally (0.75mA @13.6V) and less than 150mW when all relays are ON (10mA @13.6V).
Features
- 3 relay outputs, 250Vac 5A max, with overvoltage protection (varistors)
- 3 AC inputs, 90-250V, to monitor voltage on loads
- 1 common (Neutral or Line) for both relays and AC inputs, to simplify connections
- 5 programmable I/Os
- 8÷25Vdc power supply
- 10mW power consumption
- 150mW max power consumption
- 52x89x65mm
Video showing how DomBus33 works
Click on the picture below to watch the video!
Domoticz configuration
- In Domoticz, install the Creasol DomBus plugin, if not already done, from GitHub or from Python Plugin Manager
- Connect this DomBus module to the domotic controller by a simple RS485/USB adapter (the preferred reliable solution), or by a RS485/net module or radio interface . Please note that more DomBus modules can be connected together to the same bus. Also, it's possible to manage more DomBus buses, for example one for each floor.
It's recommended to supply each bus at 13.8V, with a backup battery, to get a home automation system working even in case of blackout; protect the bus with a fuse (1A or more, depending how many devices are connected).
Assure that termination resistor is connected/enabled in each bus end (two 120 Ohm resistors for each bus); DomBus modules already have a termination resistor that can be enabled by a solder iron. - Check in the Switches panel for the new device, named (ff33.1) InAC1, edit it, and in the description add the following "command"
,HWADDR=0x0001
or similar to program the module with a new, unique, address between 0x0001 and 0xfeff (hexadecimal format), then save - Reload the Switches panel: all device ports will be added automatically and will be ready to use.
Home Assistant configuration
- You have three ways to get DomBus modules working with Home Assistant (or other controllers supporting MQTT with AutoDiscovery):
- By using the DomBusGateway app (ready-to-use add-on for HAOS or HA Supervised)
- By using the DomBusGateway bridge (python software)
- By using the DomBusGatewayPIS hardware
- Use the DomBusGateway system you prefer: DomBusGateway is a bridge between the DomBus network and any home automation system supporting MQTT; moreover, thanks to AutoDiscovery, all entities will be created automatically.
- Enable MQTT integration in Home Assistant
- Connect this DomBus module to the domotic controller (or DomBusGatewayPIS hardware) by a simple RS485/USB adapter (the preferred reliable solution), or by a RS485/net module or radio interface . Please note that more DomBus modules can be connected together to the same bus. Also, it's possible to manage more DomBus buses, for example one for each floor.
It's recommended to supply each bus at 13.8V, with a backup battery, to get a home automation system working even in case of blackout; protect the bus with a fuse (1A or more, depending how many devices are connected).
Assure that termination resistor is connected/enabled in each bus end (two 120 Ohm resistors for each bus); DomBus modules already have a termination resistor that can be enabled by a solder iron. - If more devices of the same type must be connected, it's recommended to modify the module address: connect DomBusGateway by telnet (port 8023) then type the commands
showmodule ff33 (to check that module is detected)
setport 1 hwaddr=101 (to set the device hardware to the new, unique value 101: valid address from 1 to efff, hex format)
You'll find the new device, with that address, in the MQTT integration and in the dashboard.
Node-RED, OpenHAB, ioBroker and other system supporting MQTT
Please check previous section, dedicated to Home Assistant: DomBus devices can be managed by any system supporting MQTT by using the bridge DomBusGateway: a python daemon running in background, or a dedicated hardware (Rock PI S) running DomBusGateway software.
Systems that support AutoDiscovery automatically detect all entities (ports) of the DomBus module.
A telnet interface on DomBusGateway permits to make some customization, for example device hardware setting, port configuration, ...
Using DomBus devices with Modbus protocol
DomBus modules are available in two versions:
- supporting Modbus protocol: this is a standard master/slave protocol that can be useful in some cases, for example to manage relay outputs, inputs that do not change frequently, sensors, DomBusEVSE module (to build a EV charging station), DomBusTracker2 (to control a single/dual axis solar tracker), ...
- supporting DomBus protocol: this is a proprietary protocol, low latency, that also permits to exchange commands between modules (called DCMD) to realize simple automations that work even in case that the domotic controller is down. This is the preferred protocol, expecially when alarm sensors are needed.
Below is shown some information to manage DomBus modules programmed with Modbus firmware.